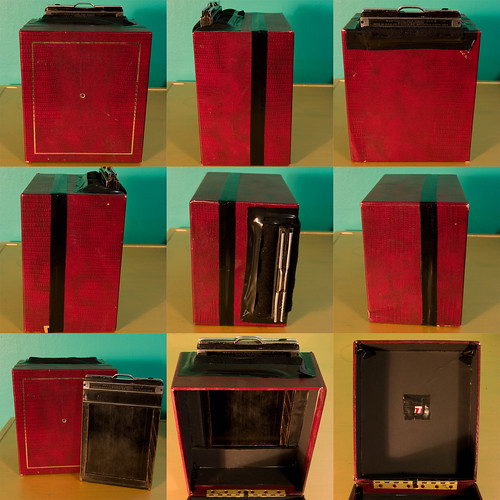
I found a nice looking box from the thrift store for fifty cents as my pinhole camera. It is a 7x6.25x4.5 inch box. We made a hole in the middle of the front of the box, then sanded the hole down flat. Afterwards we stuck the pin into the aluminum can half way. With the ragged edges facing the inside of the box, we taped the aluminum exactly in the middle of the hole.
Since I planned on using a 4x5 film holder, I had to cut out a slightly larger hole than the holder above the box. I also had to figure out a way to keep the holder in secure place.
After cutting the space out to fit the holder, I placed it inside to measure the space on the side. I had to make a slot to hold it in place. Since I do not own wood cutting supplies, I had to use cardboard instead, stacking them until it was the same height as the side of the holder. I cut cardboard out to fit around the holder (sides and below) and a piece slightly on top to keep it locked in. Then glued the pieces in place. Afterward instead of painting the inside of it, I lined it with black card stock paper and taped any possible light leaks with black tape.
Next, I had to figure out a way to cover the slot around the holder to keep light from leaking in the top. Luckily, I had some black felt lying around. I had to fold a couple pieces together to make them thick enough to seal the hole. Then stapled it all around and applied more black tape.
Finally I could slide the holder in place and tape the outside with black tape and it's ready for a test.
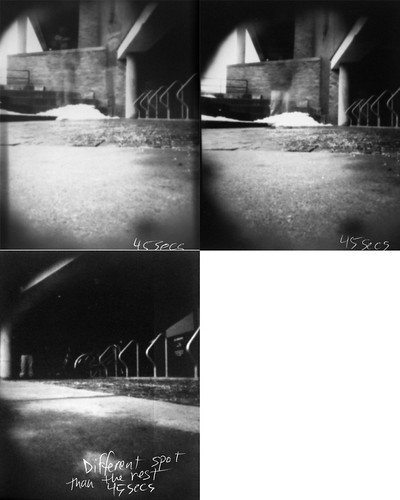
These are the tests we made with photographic paper:
We started of with 25 seconds and it was underexposed, so we tried 100 secs which was overexposed. After those two tests, we tried 70 secs, a couple 60secs and some 45 secs. 45 secs seemed to be the best exposure.
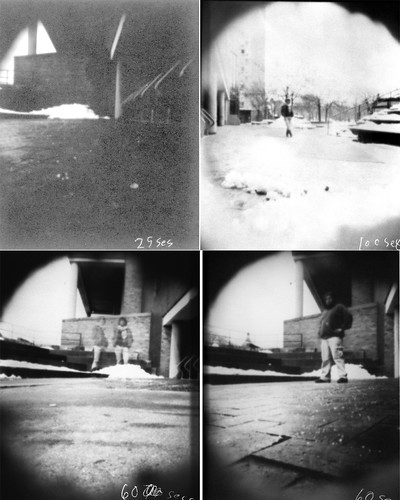
Luckily there were no light leaks. I did notice vinnetting, which was cause by the short depth of the box. Fortunately, I like that look.
Next, we plan to use film to test out the F-Stop.
 Film testing with my pinhole. Metered at 1/125 f5.6 ISO 100 (that kind of a day) shot at ISO 200 for 1 minute.
1 comment:
woohoo yeah! we win baby uh huhhh!
Post a Comment